Conferencia Internacional de Software Libre means Free Software International Conference.
On September 9th I will be giving a talk about Fedora 15 in our National Library. I will also talk a bit about the spins and what is coming in Fedora 16.
Another thing I will be talking about is the community and the different roles that our project has and how everyone can join us!
If you have any hint please feel free to leave a comment and/or wish me luck!
El 9 de Septiembre a las 14:00 voy a dar una charla acerca de Fedora 15 en la Biblioteca Nacional. También voy a hablar sobre los Spins y que vendrá con Fedora 16.
Asimismo hablare sobre la comunidad, los diferentes roles que cualquiera puede tomar y como involucrarse!
Yesterday while shrinking a filesystem my computer got stock due a hardware failure:
[root@mirror /]# resize2fs -p /dev/mapper/vg_mirror-LogVol03 410G

resize2fs 1.41.14 (22-Dec-2010)

Resizing the filesystem on /dev/mapper/vg_mirror-LogVol03 to 107479040 (4k) blocks.

Begin pass 2 (max = 15391251)

Relocating blocks XXXXXXXXXXXXXXXXXXXXXX------------------
Booted from a DVD in the rescue environment, mounted the filesystem and everything was OK. The size was still the original. I performed an e2fsck and then tried again. Apparently, the “Relocating blocks” part doesn’t cause any corruption if interrupted 😀
Spanish
Ayer mientras achicaba un filesystem mi computadora se freezo por un problema de hardware:
[root@mirror /]# resize2fs -p /dev/mapper/vg_mirror-LogVol03 410G

resize2fs 1.41.14 (22-Dec-2010)

Resizing the filesystem on /dev/mapper/vg_mirror-LogVol03 to 107479040 (4k) blocks.

Begin pass 2 (max = 15391251)

Relocating blocks XXXXXXXXXXXXXXXXXXXXXX------------------
Bootie desde un DVD, en modo rescate, monte el filesystem y todo estaba bien. El tamaño del filesystem todavía era el original. Realice un e2fsck y después probé de nuevo con el resize2fs. Aparentemente la parte de “Relocating blocks” no hace ningún daño si se interrumpe 😀
Imagine that you are back in the past when the internet was just text and the only way to communicate with other people was IRC.
Well, it’s possible to connect to almost everything with bitlbee. I’m sure most of you already know probably about this, but I didn’t know until yesterday and that’s why I’m blogging about it.
Installation
As simple as:
yum -y install bitlbee
Configuration
Edit the file /etc/xinetd.d/bitlbee and change “disabled = yes” with “disabled = no”
Start xinetd
service xinetd start; chkconfig xinetd on
First steps
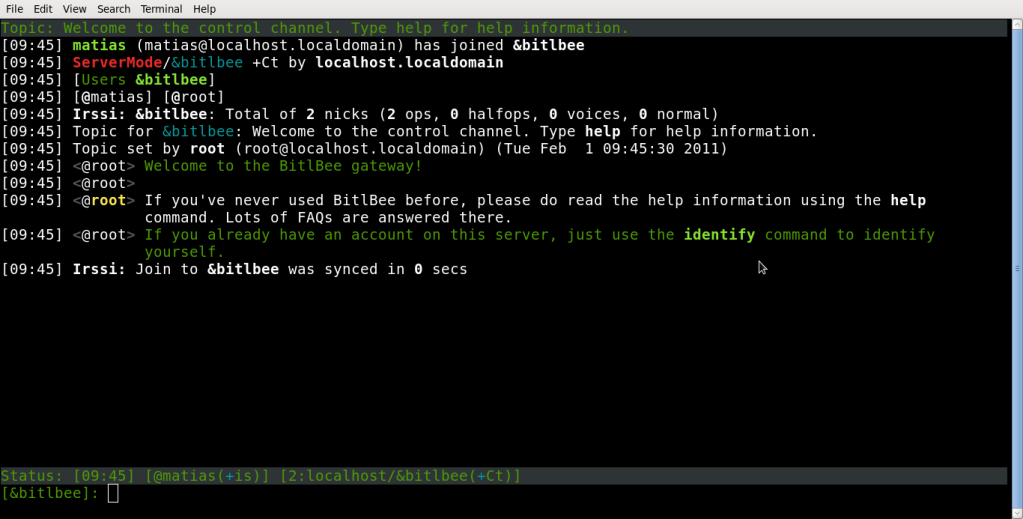
Set up your favorite IRC client to connect to localhost:6667 , as bitlbee works a local IRC server in your computer, you could easily try to connect to it with /server localhost, the persistent configuration to autoconnect will depend in your IRC client, I use a client-based old client, irssi. Once connected it will join you to a channel called &bitlbee
Once on that channel you will have to start setuping your IM accounts, but first you may need to register to bitlbee as it will store your credentials (I’m sorry, is the only way it works, but no worries it remains somewhere in your pc).
To register say in the &bitlbee channel:
register PASSWORD
pick a password strong enough.
The next time you join this channel you will have to use:
Now you would need to set another thing to help bitlbee to bring the facebook nicknames in a friendly way.
account fb set nick_source full_name (BitlBee 3.0+)

account set facebook/nick_source full_name (Older versions)
Gtalk
This is easy:
account jabber youruser@gmail.com yourpassword
The syntaxis is always the same “account [protocol] [user] [password]”
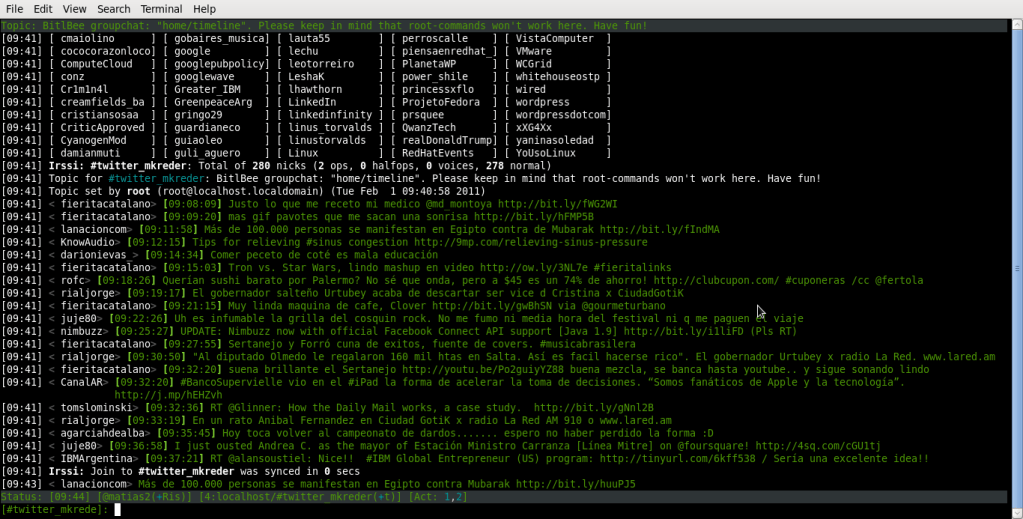
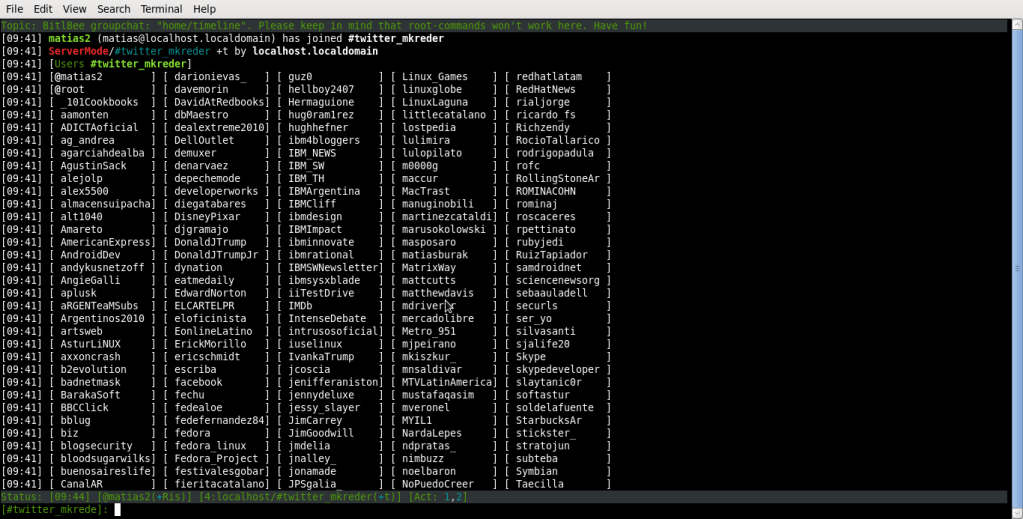
Twitter
Yes!, twitting from the IRC is really nice, the command would be:
account add twitter user password
it will first start a new query, giving you an URL, you have to click on that URL and it will give you a passcode, then you can put that passcode on that query and that’s all, it will create a new IRC channel called #twiiter_youraccount and you can see twitter as it was a normal IRC channel:
Almost done
After setting up everything you are ready to start, just run:
account on
Have fun!
Español
Imagínense que estan en el pasado, cuando Internet era solo texto y la unica forma de comunicarse con el mundo era IRC
Bueno, es posible conectarse a casi cualquier cosa con bitlbee. Quizas la mayoria ya lo conosca, pero yo no lo conocía asi que aprovecho para escribir.
Instalación
Tan simple como:
yum -y install bitlbee
Configuración
Hay que editar el archivo /etc/xinetd.d/bitlbee y cambiar “disabled = yes” por “disabled = no”
Iniciamos xinetd
service xinetd start; chkconfig xinetd on
Primeros pasos
Configura tu cliente de IRC favorito para conectarse a localhost:6667 , como bitlbee funciona como un servidor de IRC local en tu PC, basta con conectarse usando /server localhost. La configuraion para autoconectarse cada vez que abrimos el cliente va a depender del mismo particularmente. Yo uso irssi.
Una vez conectados vamos a entrar a un canal llamado &bitlbee
En este canal, vamos a empezar a configurar nuestras cuentas, pero primero, hay que registrarse con bitlbee, ya que el va a guardar nuestras passwords. (Es la unica forma de usarlo, de todos modos quedaran en nuestra PC)
Para registrarse hay que escribir en el canal $bitlbee
register PASSWORD
Elijan un password complejo.
Cada vez que entremos a este canal, vamos a tener que identificarnos con:
También hay que configurar otra cosa más ya que sino bitlbee va a traer todos los nicks en un formato ilegible. account fb set nick_source full_name (BitlBee 3.0+)
account set facebook/nick_source full_name (Older versions)
Gtalk
es facil:
account jabber usuario@gmail.com password
La sintaxis es siempre la misma “account [protocolo] [usuario] [password]”
Twitter
Twittear desde el IRC esta muy bueno, el comando sería:
account add twitter user password
Esto va a abrir un privado con una URL, tenemos que entrar a esa URL y después poner en el privado el passcode que nos devolvió twitter. Esto va a abrir un canal de IRC llamado #twitter_cuenta, y podemos empezar a usar twitter como si fuera un canal de IRC más.
Casi terminamos
Una vez que todas las cuentas están configuradas debemos correr:
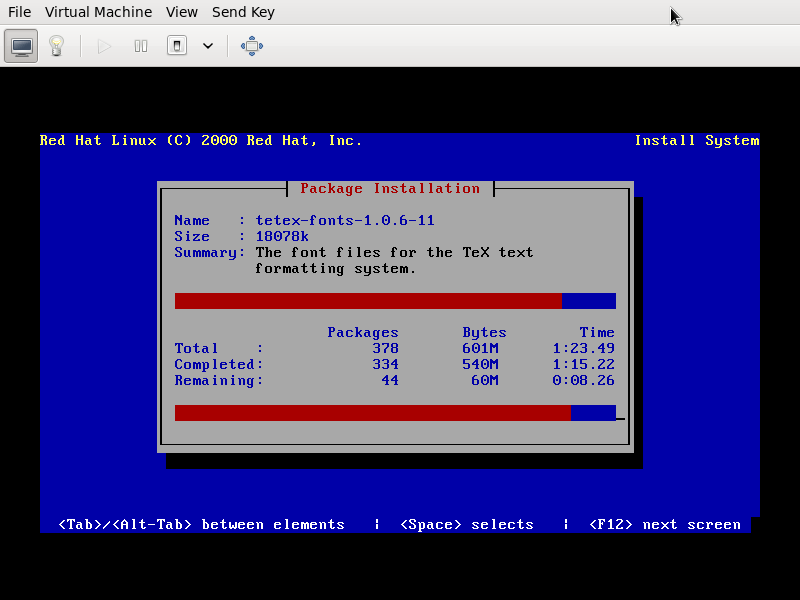
Some days ago I felt some nostalgic feelings and I tried to install a red hat 6.2 version into a fedora 14 host.
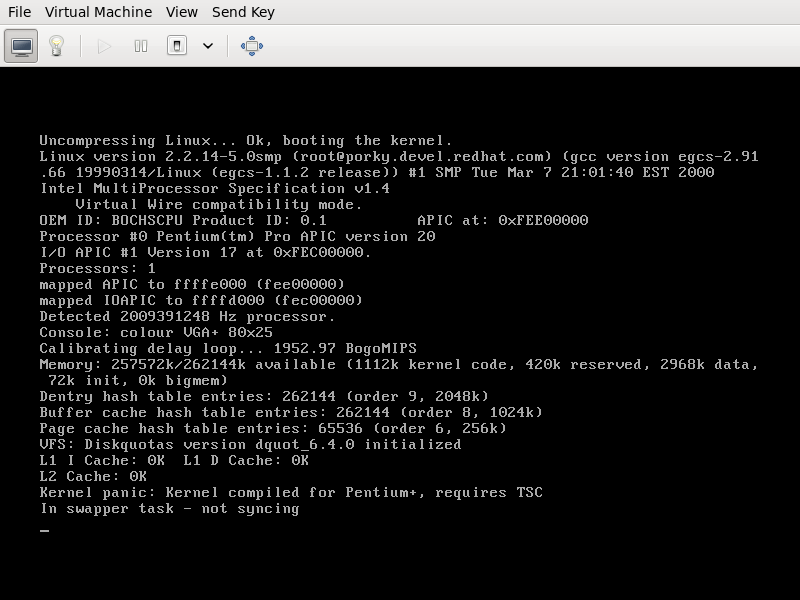
The installation was painfully slow, but it was completed successfully anyway. The problem is that after booting the new (not really) redhat 6..2, I got a kernel panic with the following message:
“Kernel panic: Kernel compiled for Pentium+, requires TSC”
after googling that, I found that one of the solutions would be recompile the old linux kernel with the option “Unsynced TSC support”, I’m to lazy to do that just for fun, I would do it if I have no choice, but I have some doubts, why the kernel in the installation cd is not failing? and, is it because my computer has an AMD processor?
Español
Hace algunos días sentí un poco de nostalgia y trate de instalar redhat 6.2 en mi PC con fedora 14
La instalación fue bastante lenta, pero se completo sin mayores problemas. El problema es que después de bootear la nueva (chiste!) instalación, obtuve un kernel panic con el siguiente mensaje:
“Kernel panic: Kernel compiled for Pentium+, requires TSC”
Después de googlear un rato, encontré que una de las soluciones seria recompilar el kernel del viejo linux, con la opción, “Unsynced TSC Support”, lo haría pero soy demasiado perezoso para hacer eso. Pero me quedan algunas dudas, porque el kernel del cd no fallo? este fallo es porque mi PC tiene procesador AMD? hmmm, no lo sé
Updating to Fedora 13 with preupgrade I faced some issues. The first one, which apparently is not documented, is that while downloading release info, I got an error message telling me that there was a problem with the mirror.
running preupgrade in a terminal, I saw the following error:
checksum failure downloading vmlinuz
There was definitely a problem with the mirror. I tried several times getting the same error, so I decided to ask in #fedora-qa about it.
edit releases.txt, comment mirrorlist and uncomment baseurl, setting the URL of the mirror that we choose, or leaving the default URL download.fedora.redhat.com.
Then run preupgrade with releases.txt in our $PWD
Another issue that I had was reported in BZ 573451
I’m stilling updating and I hope it ends successfully.
“delete: it’ll only work if you blog about it and tell others how to do it! :)”
Actualizando a Fedora 13 con preupgrade me encontré con varios issues. El primero, que no parece estar muy documentado, es que mientras descagarba la información de la release, obtenía un error que me decía que había un problema en el mirror.
Iniciando preupgrade en una terminal, pude ver que este era el error:
checksum failure downloading vmlinuz
Así que definitivamente si había un problema en el mirror, intente varias veces obteniendo el mismo error. Decidí consultar en #fedora-qa acerca de como resolver este problema.
editar el archivo releases.txt comentado mirrorlist y descomentado baseurl, configurando nosotros la URL del mirror que elegimos o la URL por defecto de download.fedora.redhat.com.
Luego ejecutar preupgrade en el mismo $PWD en el que se encuentra el archivo releases.txt modificado
Otro problema que tuve fue el reportado en BZ 573451
Todavía estoy actualizando y espero que termine exitosamente.
“delete: it’ll only work if you blog about it and tell others how to do it! :)”
English
Updating to Fedora 13 with preupgrade I faced some issues. The first one, which apparently is not documented, is that while downloading release info, I got an error message telling me that there was a problem with the mirror.
running preupgrade in a terminal, I saw the following error:
checksum failure downloading vmlinuz
There was definitely a problem with the mirror. I tried several times getting the same error, so I decided to ask in #fedora-qa about it.
edit releases.txt, comment mirrorlist and uncomment baseurl, setting the URL of the mirror that we choose, or leaving the default URL download.fedora.redhat.com.
Then run preupgrade with releases.txt in our $PWD
Another issue that I had was reported in BZ 573451
I’m stilling updating and I hope it ends successfully.
“delete: it’ll only work if you blog about it and tell others how to do it! :)”